In this blog post, you’re going to learn how to use the element to create native autocomplete dropdowns for your applications.
Let’s get started.
The

A datalist autocomplete dropdown in Google Chrome.
The element is used to specify all of the possible values for the autocomplete list. Each of these values is defined using an element, as shown in the example below.
The element should have an id attribute. To link your datalist to an element, you need to specify a list attribute on the input and set its value to the id of your datalist.
That is all you need to add auto-complete functionality to an element. The browser will take care of searching the datalist options for matching values and then displaying those to the user.
Loading Options via AJAX
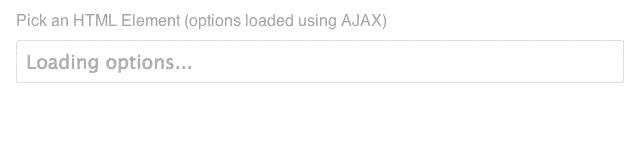
A datalist autocomplete dropdown with options loaded via AJAX.
If you want to add a large number of options to your , you may want to store those values in an external JSON file. You can then fetch this file via AJAX and populate the options once the page has loaded. Let’s look at an example of how to do this.
Like before, we start with and elements. Ensure that you link the two using the id and list attributes.
We then need to get references to these two elements in the JavaScript code.
// Get the Next, we need to load the JSON file (html-elements.json) and populate the options for the element. For this example, we’re just using an array of strings, but it’s also possible to use a more complex data structure.
// Create a new XMLHttpRequest.
var request = new XMLHttpRequest();
// Handle state changes for the request.
request.onreadystatechange = function(response) {
if (request.readyState === 4) {
if (request.status === 200) {
// Parse the JSON
var jsonOptions = JSON.parse(request.responseText);
// Loop over the JSON array.
jsonOptions.forEach(function(item) {
// Create a new This code will load the html-elements.json file using an XMLHttpRequest. Once the file has been fetched, we parse the raw JSON data so that we have a JavaScript array to work with. We then loop over each of the items in this array. Each time we create a new element, set the value attribute to the current item in the array, and then add this element to the .
In this example we’re also using the element’s placeholder property to display the loading status for the datalist options.
Browser Support
Support for the element among browsers is pretty good. Safari is the only modern web browser not to include support for . It’s worth noting that the implementation of this element in IE10 is known to be buggy.
| IE | Firefox | Chrome | Safari | Opera |
|---|---|---|---|---|
| 10.0+ | 4.0+ | 20.0+ | – | 9.0+ |
Source: http://caniuse.com/#feat=datalist
Final Thoughts
In this post, you’ve learned how to use the element to create native autocomplete dropdowns for your web applications. You’ve also learned how to use AJAX to populate datalist options from an external JSON file.
The element is just one of a number of new elements that provide native implementations of commonly used UI components. By making these elements really simple to use, browser vendors are removing the need for developers to rely on JavaScript libraries in these areas. Standardizing the behavior of UI components also has the added benefit of creating a more consistent experience for users across the web.
comments powered by Disqus